The process of designing and building a playable location within a game involves a meticulous art pipeline that encompasses various stages and collaboration between artists, game designers, and 3D artists. In this article, we delve into the intricacies of game environment creation and show what each stage looks like based on our recent art project “The Last Molfar.”
What is The Last Molfar?
The Last Molfar is a concept of a story-driven game that immerses you into the world of Slavic mythology, Cossacks, Molfars, and Ukraine during the times of Bohdan Khmelnytsky. The game’s protagonist, Askold, embarks on a journey to rebuild the Order of Molfars, seeking revenge on those who destroyed it. Accompanied by his loyal spirit Guide, Askold traverses Ukraine, discovering gifted children, aiding the locals, dispelling curses, and unraveling a mysterious tangle that leads him to his archenemy.
Pre-production
The foundation of any successful project lies in robust world-building. This entails establishing the time period, location, main characters, and their interactions. This is the task of game designers, who excels in crafting engaging stories and translating them into a game medium. They consider the player experience and level navigation from both a game design and narrative perspective. On the other hand, the artist’s role is to create visually captivating 2D game environments that align with the game designer’s functional vision.
Our game designer developed a plot brunch script where the protagonist (Askold) arrives at the abandoned village and tries to detective his way through the mysteries to find out what has happened to the residents. We also created a functional, schematic top-level map depicting several points of interest in the 2D environment art where the events will take place, including the center of the village, houses, forge, the old watermill, and the church on the far side of the settlement. From this, our artists can start visualizing the idea.
Sourcing inspiration
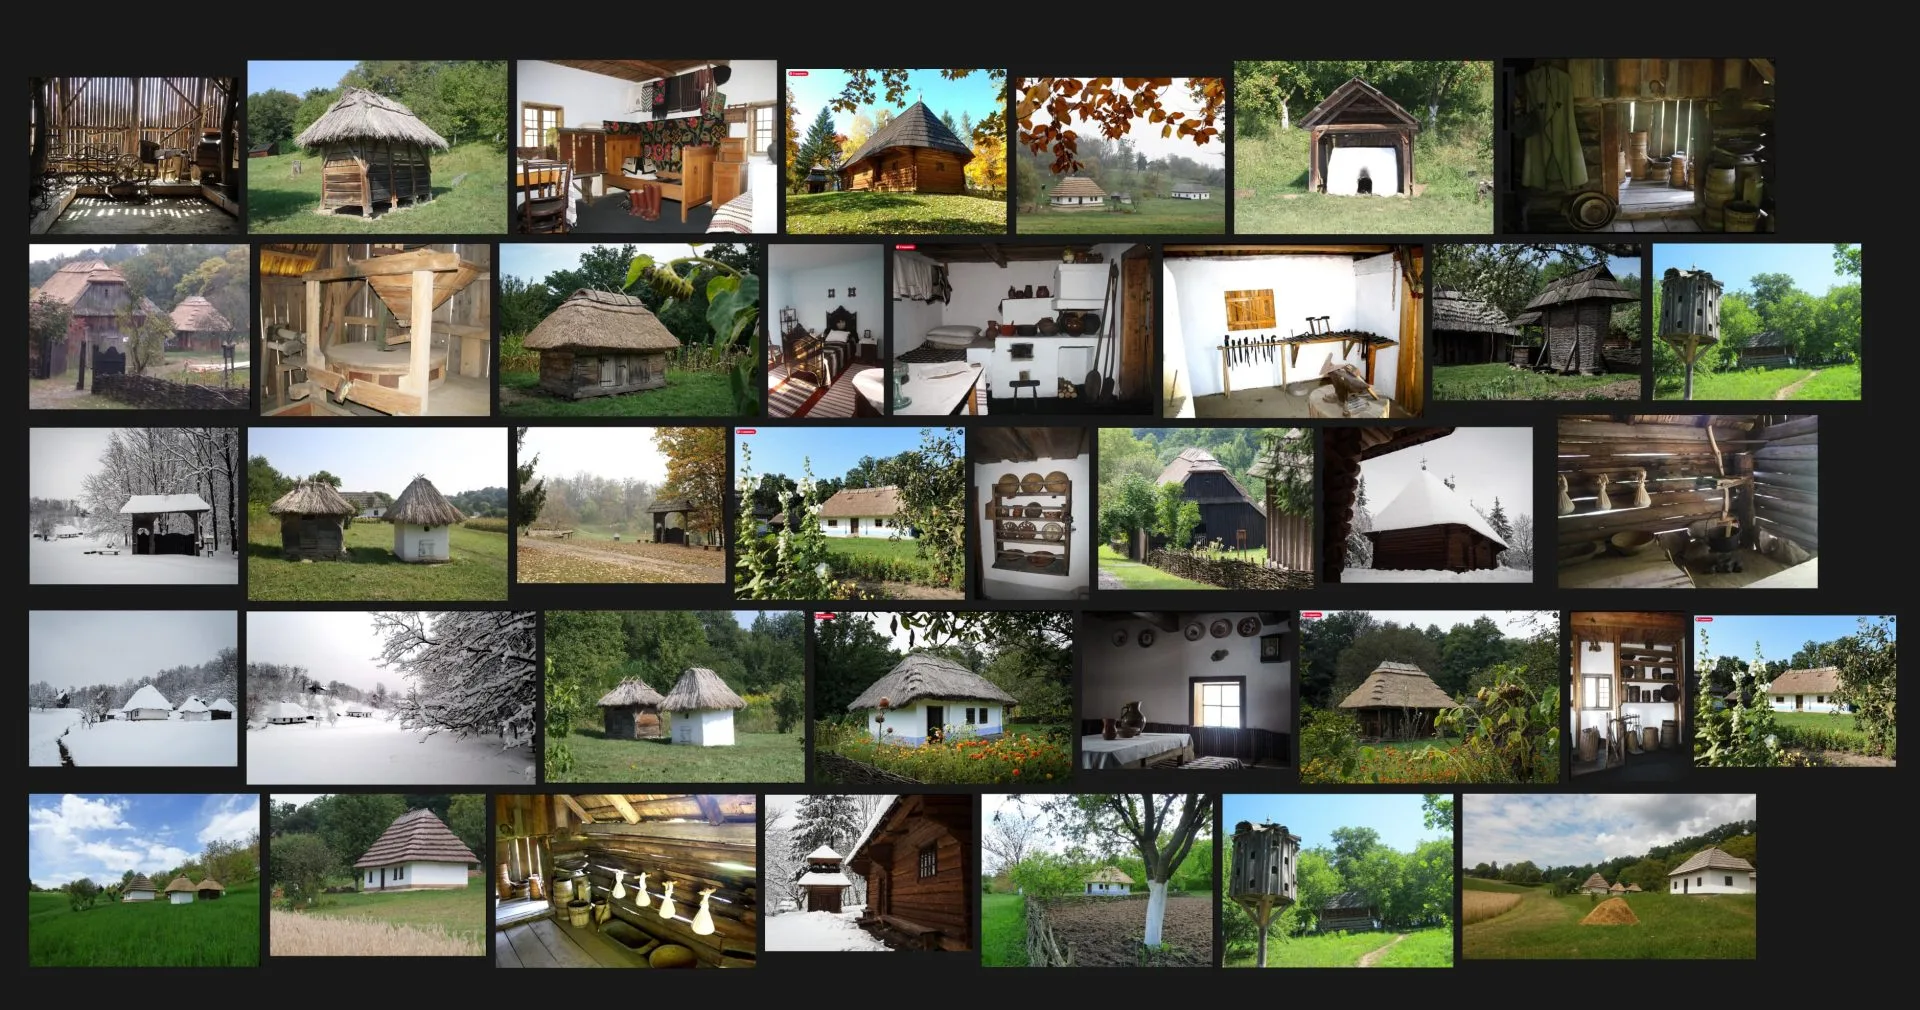
First, we do research and prepare a set of references that will pump up the inspiration and become a foundation for our future art. Our references are drawn specifically from Ukrainian history and mythology, not just the generic blend of Slavic nations’ cultures. Ukrainian folklore exhibits regional differences, both significant and minor, and we wanted to capture the distinct features in our lore and art.
Sketching a mood shot
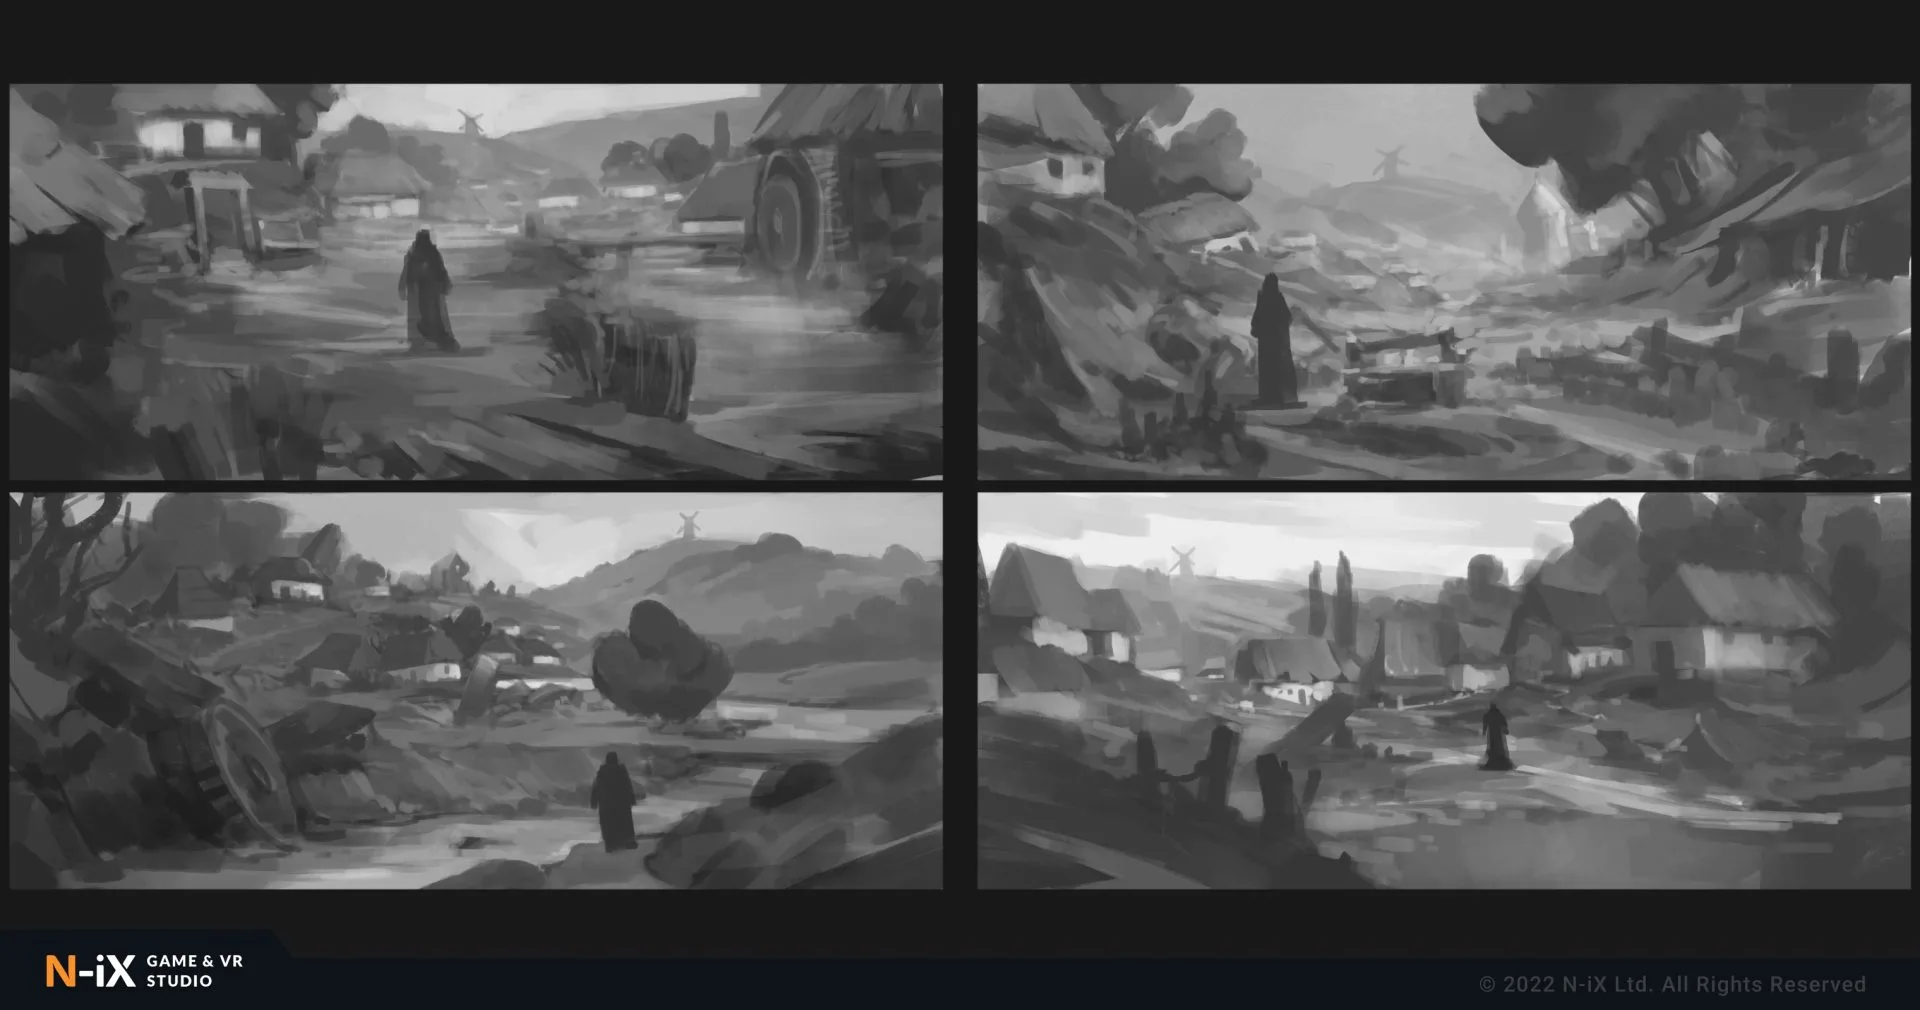
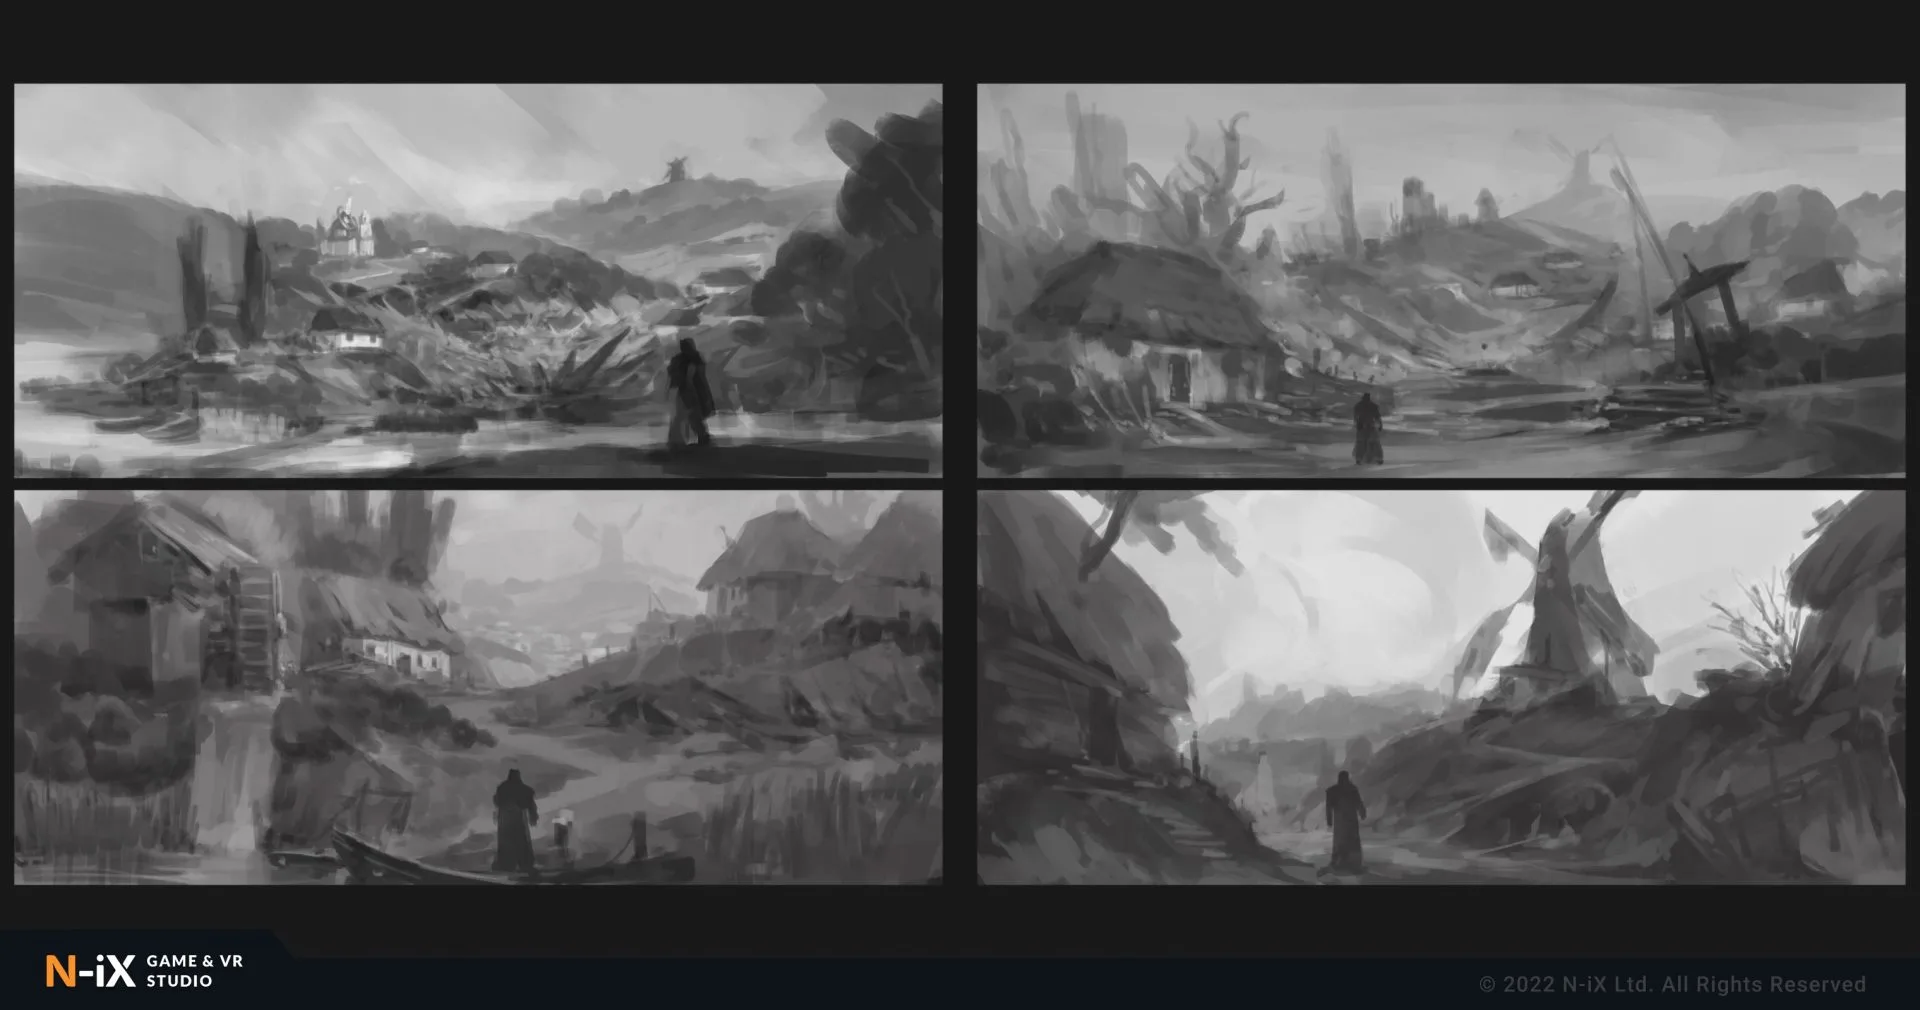
Next, we generate several 2D environment art sketches that primarily focus on the silhouette and key features of the location. These initial sketches typically employ black-and-white line art, allowing for rapid exploration of different ideas. At this stage, the emphasis is not on the artistic quality but on producing a variety of sketches until finding the one that resonates.
Our goal was to create a visually compelling composition of the village, incorporating various buildings such as simple houses, a watermill, a windmill, a church, and a small pier. The central path leading to the main objective is clearly defined, capturing the player’s attention and guiding their exploration. Remember that you’re not just making environment concept design, you’re designing an experience that players want to explore and progress through. Game art is the medium through which the narrative is told. You need key touchpoints to be highlighted so that players naturally move toward their goals.
#1
#2
#3

Adding color
Memorable visual scenes are created through deliberate choices of lighting and color. Different settings evoke distinct moods through the interplay of these elements. For instance, in a cyberpunk setting, a gritty mood is often conveyed through low light in a nighttime environment, complemented by vibrant neon colors that guide the player. In dark fantasy settings, artists frequently employ cooler colors such as blues and greens to evoke feelings of mystery, tranquility, or unease. Additionally, warmer hues like deep reds can be strategically used to emphasize moments of danger or intensity.
In the case of “The Last Molfar,” we have opted for a color palette that resonates with the natural, serene, and picturesque qualities of Ukrainian culture. Given the strong connection between Molfars and nature, it was crucial for the color scheme to reinforce this thematic element. For each location, we created quick color sketches to identify the most fitting color scheme.
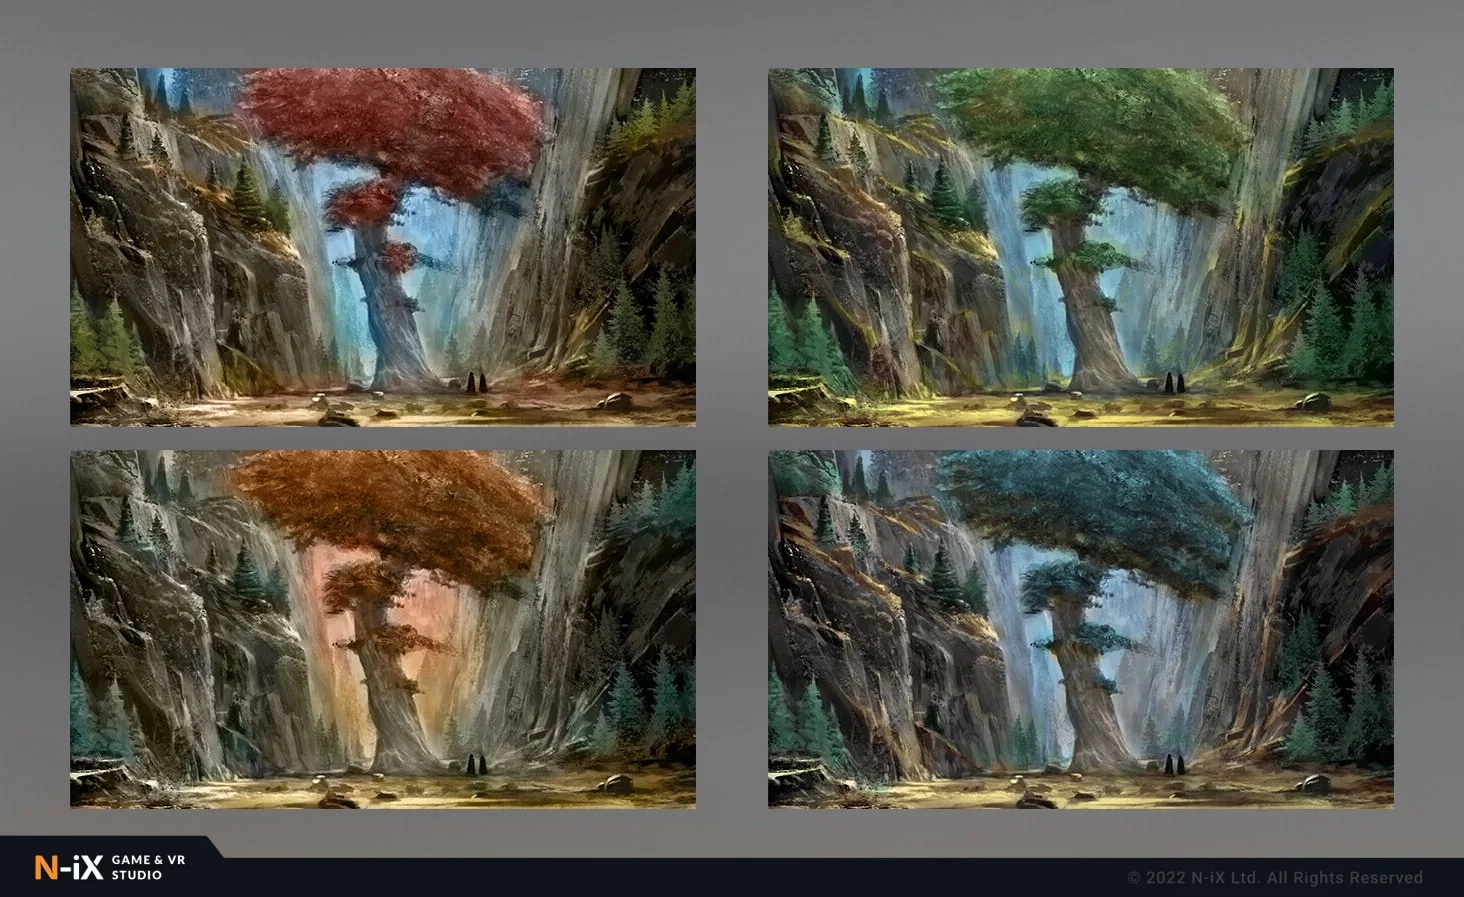
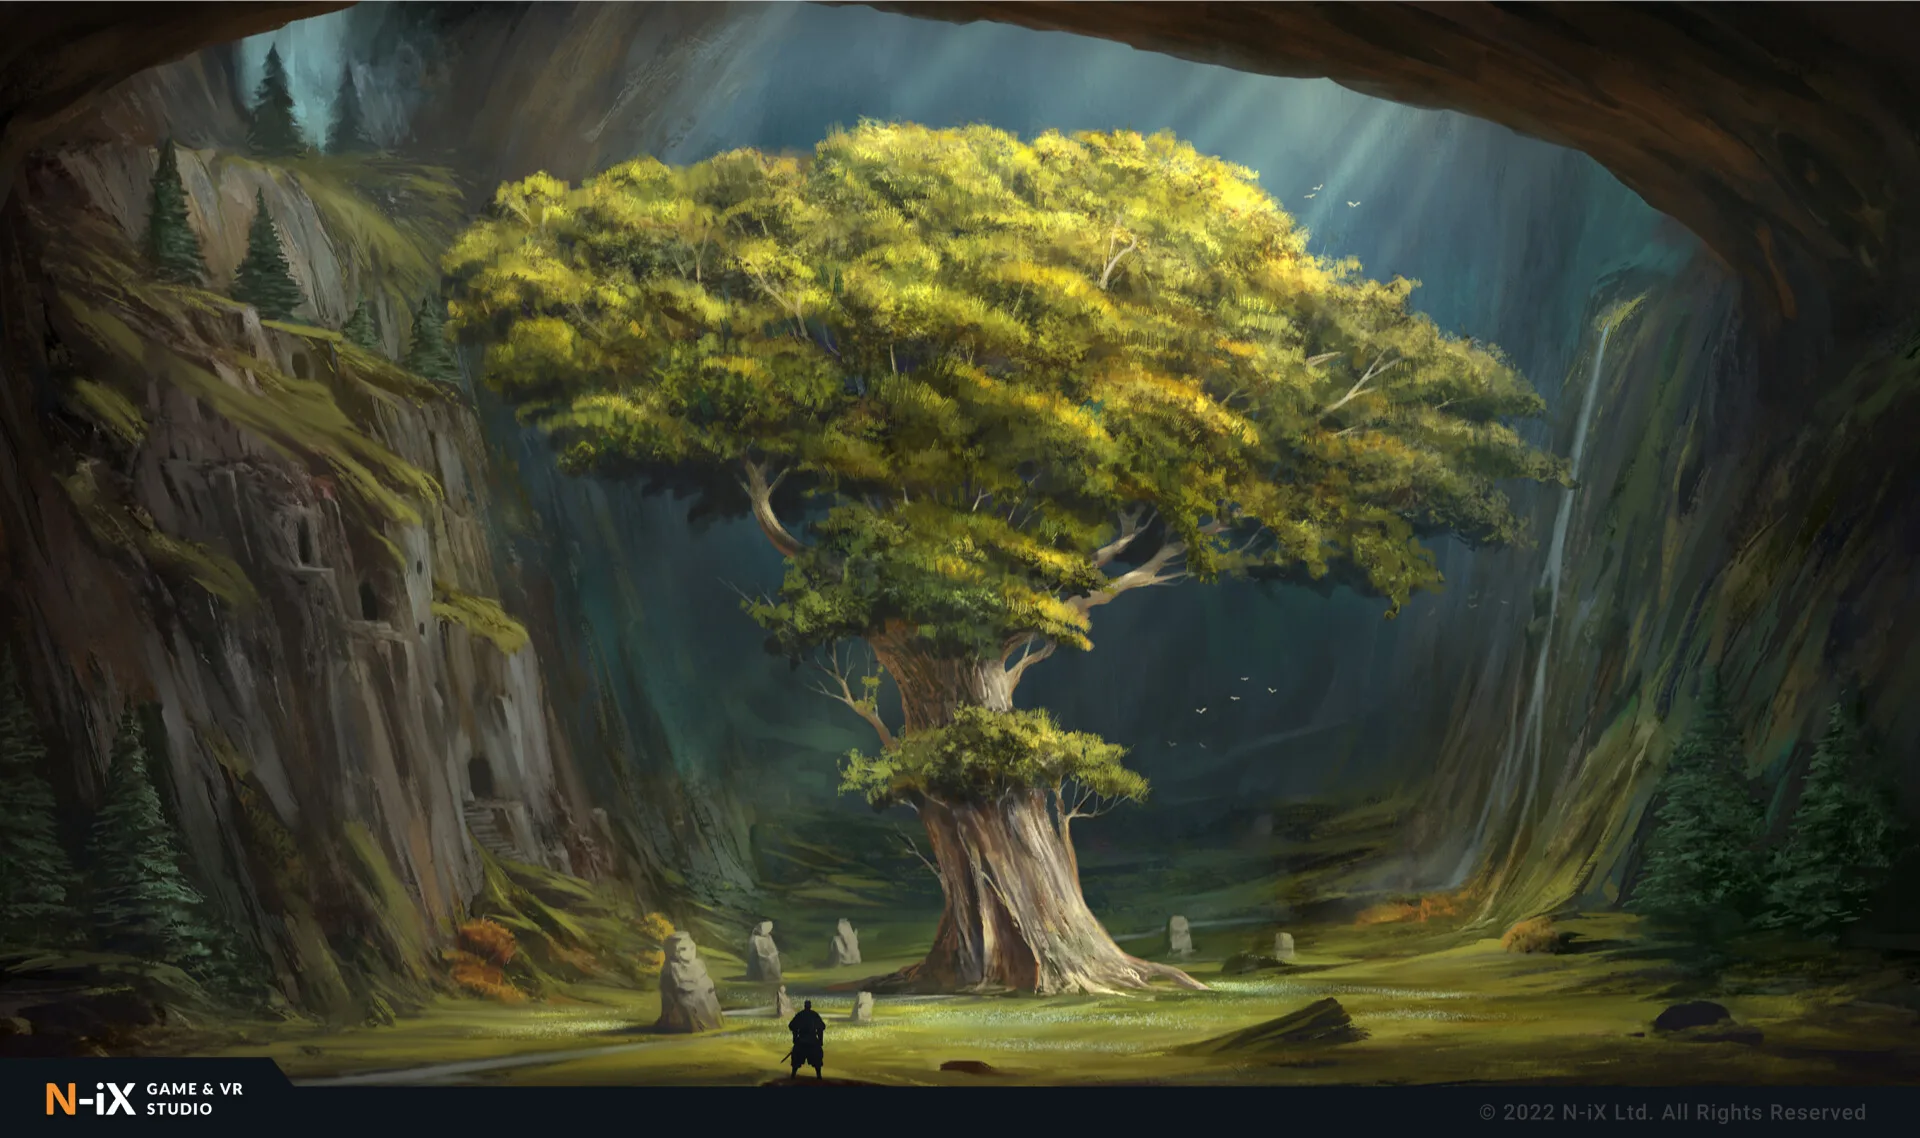
Color can also serve as a means to portray different states or changes within the same location. For example, here we have a sacred Grove for the Molfars depicted with warm and inviting colors. The grove appears vibrant, brimming with life, and concealing secrets from the outside world during the initial encounter.
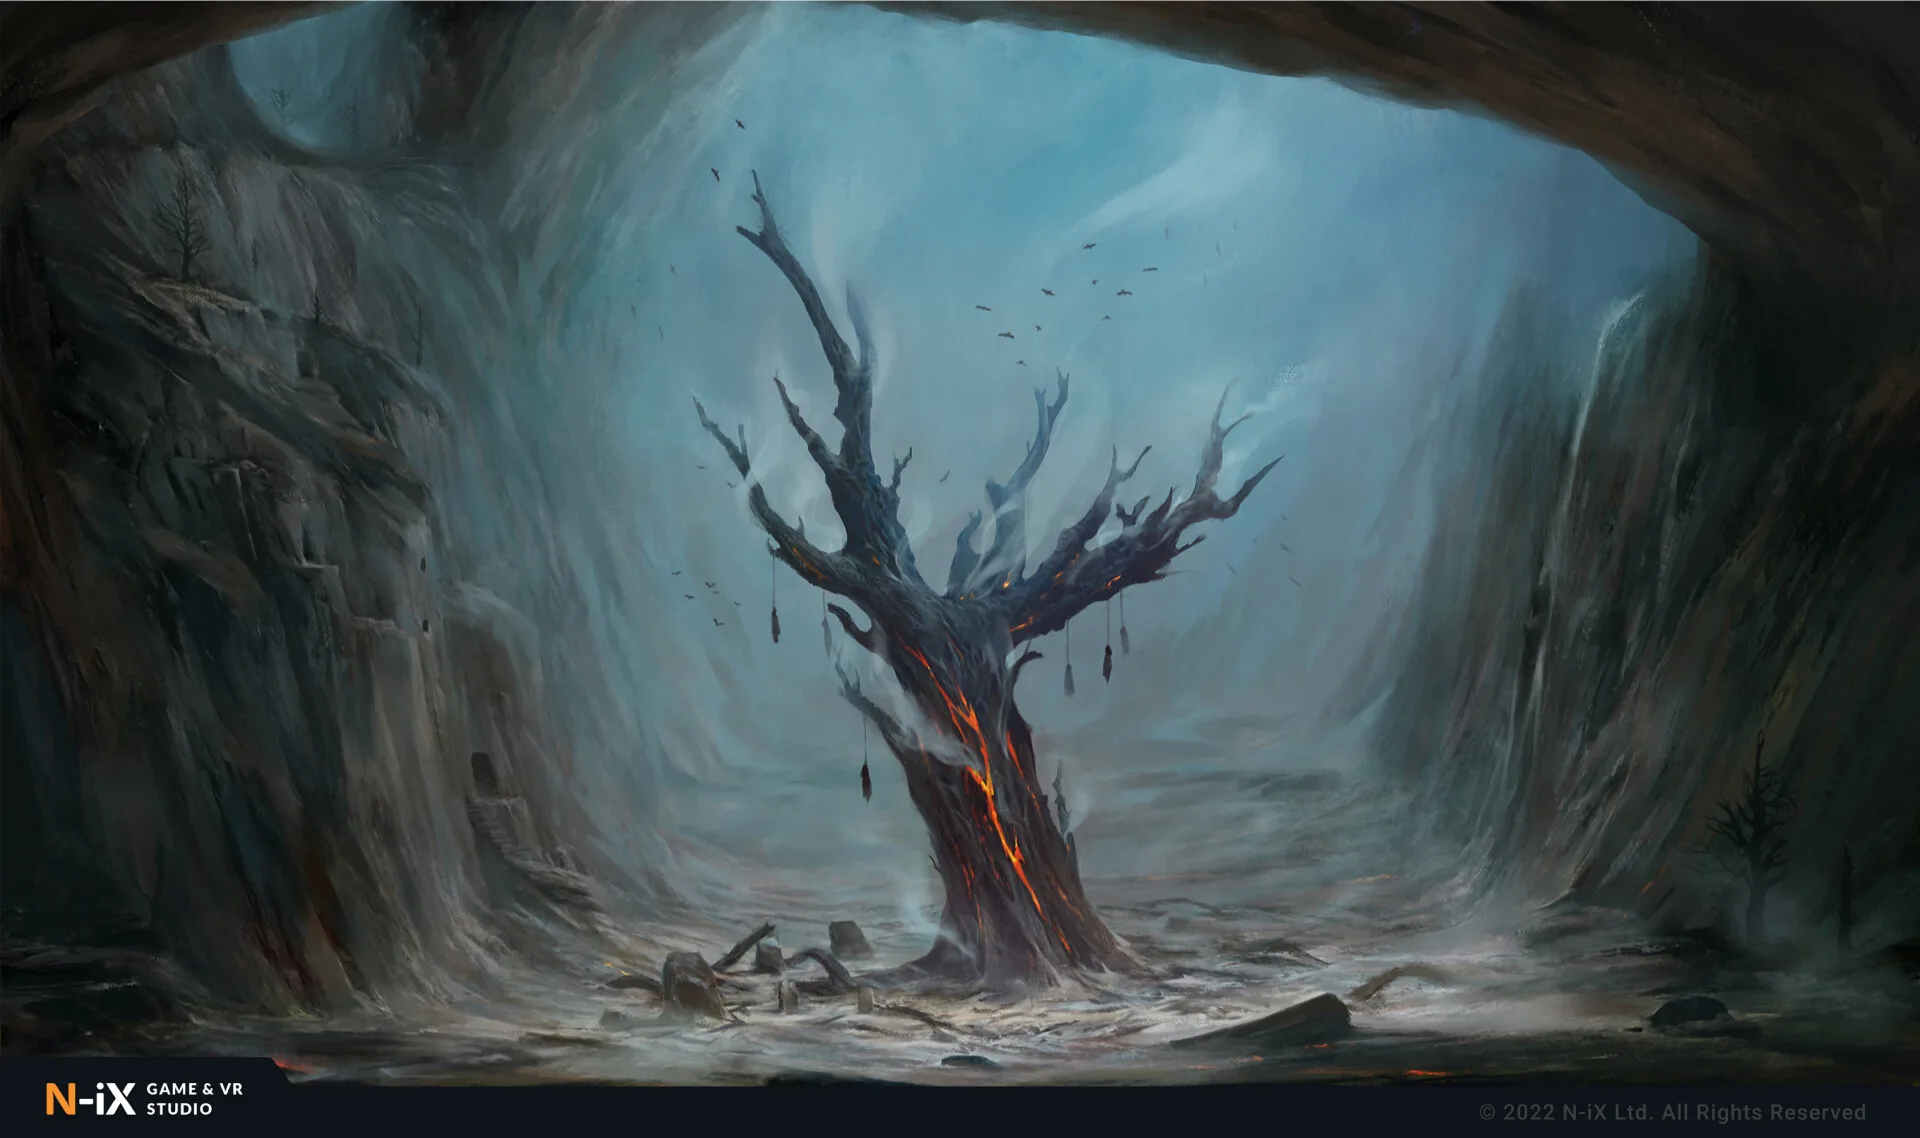
However, as the main story progresses, the antagonist desecrates the grove. To convey this transformation, we utilize cold, grayish tones alongside melancholic colors. Cooler shades, combined with the addition of fog and haze, intensify the sense of despair and loneliness that players may experience within this desecrated space.
Finalizing the mood shot
For our location, we chose a color palette that captures the essence of late summer and early fall, combining golden yellows, earthy oranges, and rustic browns:
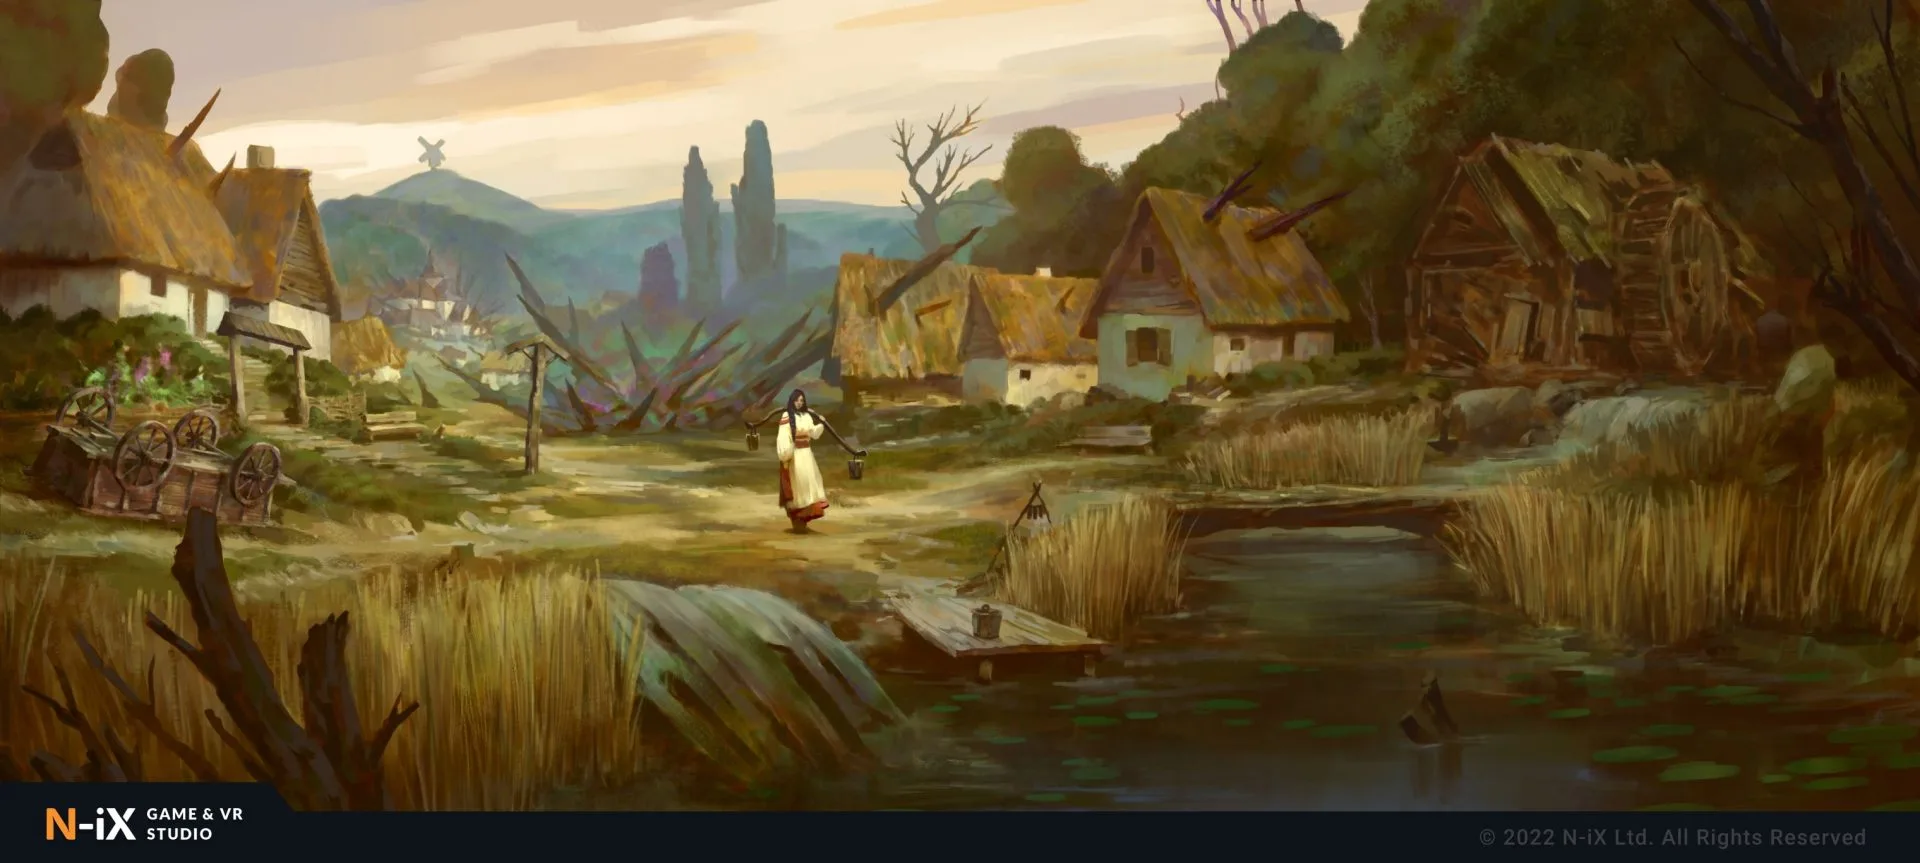
The finalization of the mood shot involves meticulous attention to detail, ensuring that the chosen color palette harmonizes with other visual elements such as lighting, textures, and environmental effects. It is crucial to strike a balance between the overall aesthetic appeal and the intended emotional impact on the players. By immersing them in a world imbued with carefully selected colors, we enhance their engagement and deepen their connection to the game environment’s narrative.
Creating in-depth concepts of the surrounding elements
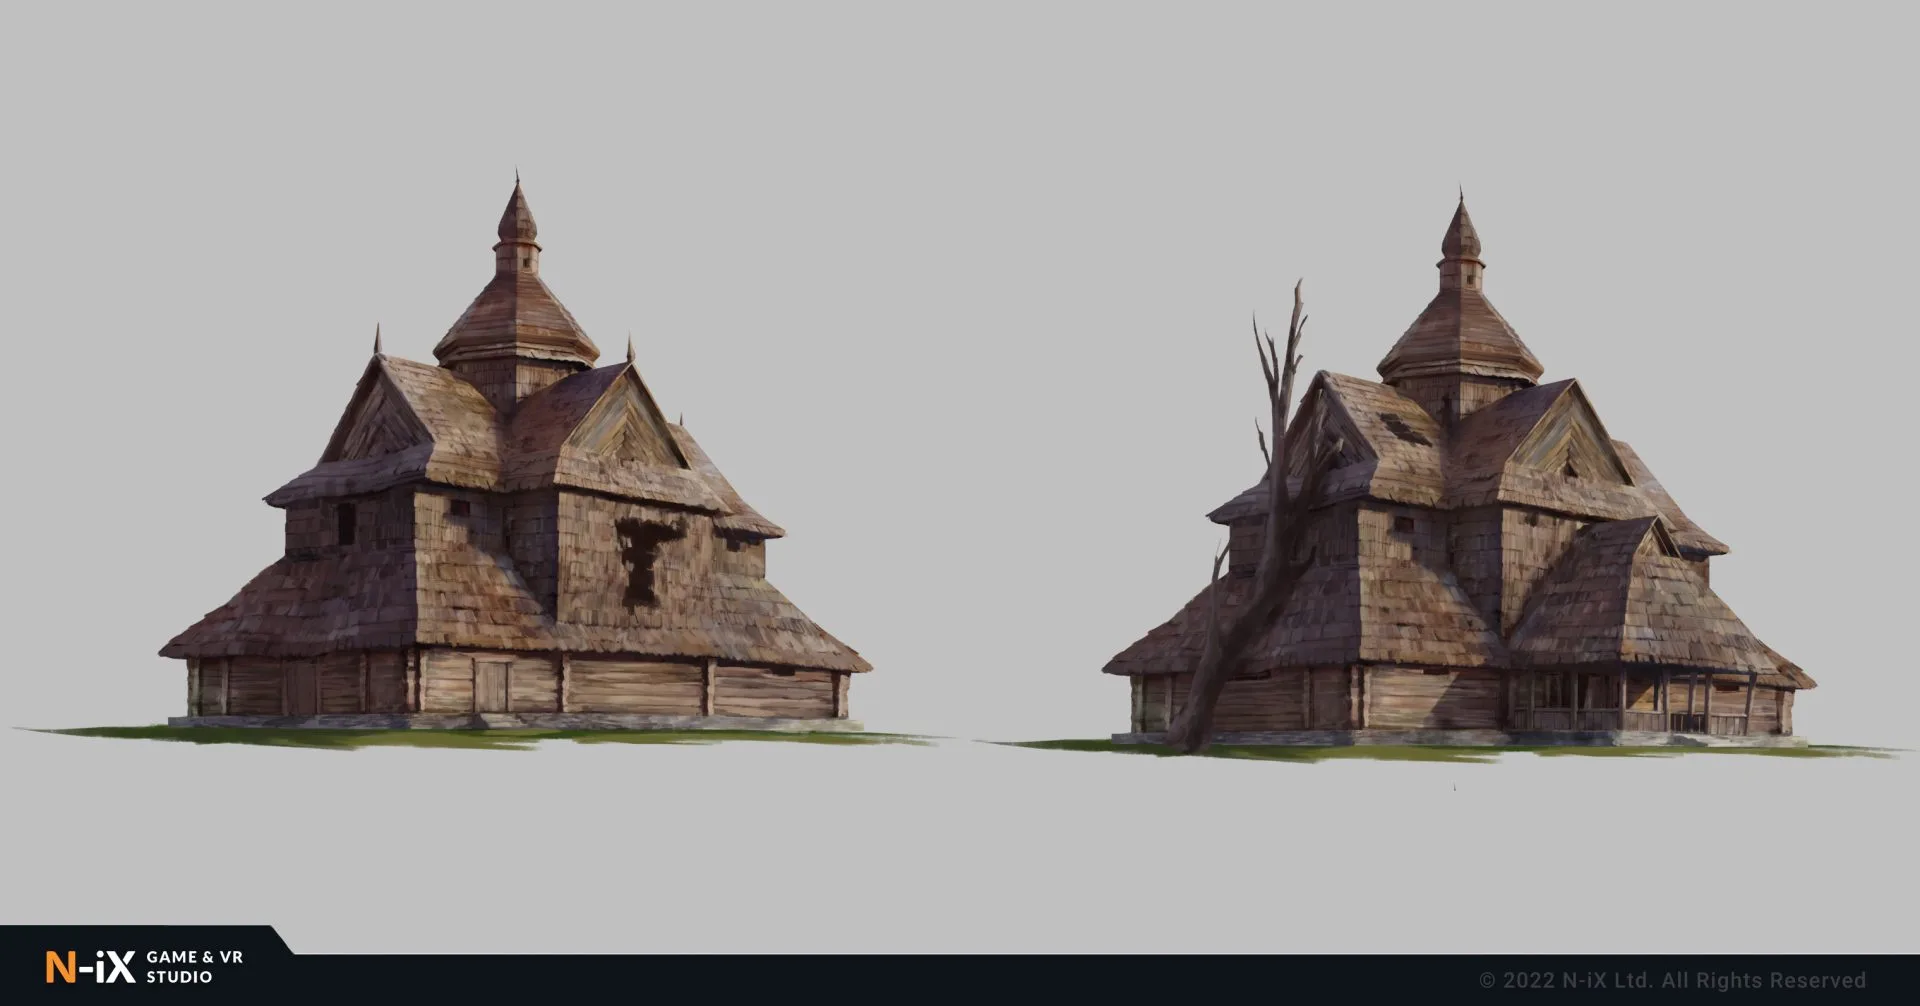
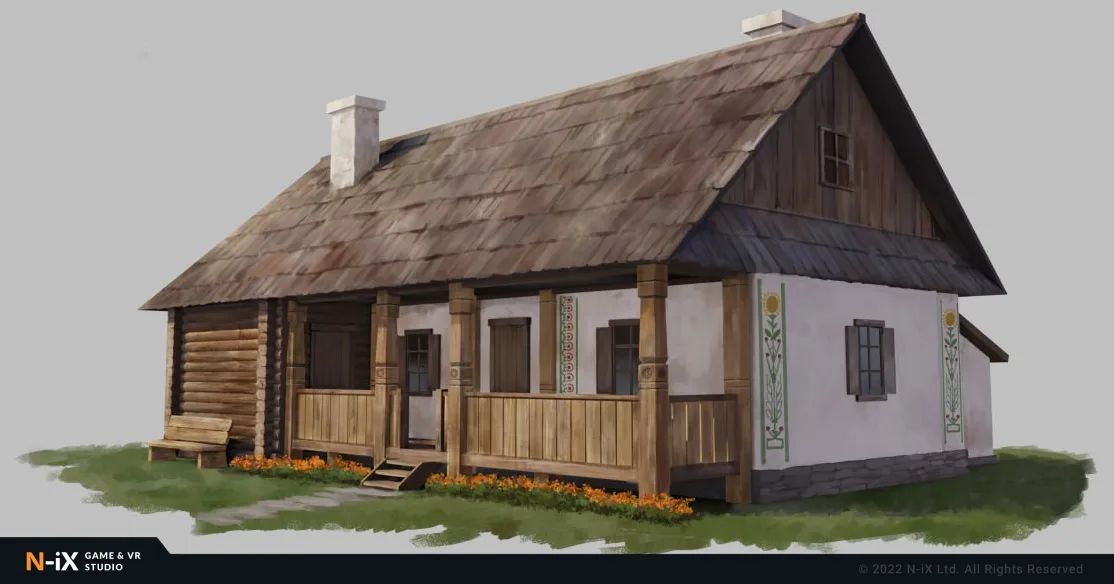
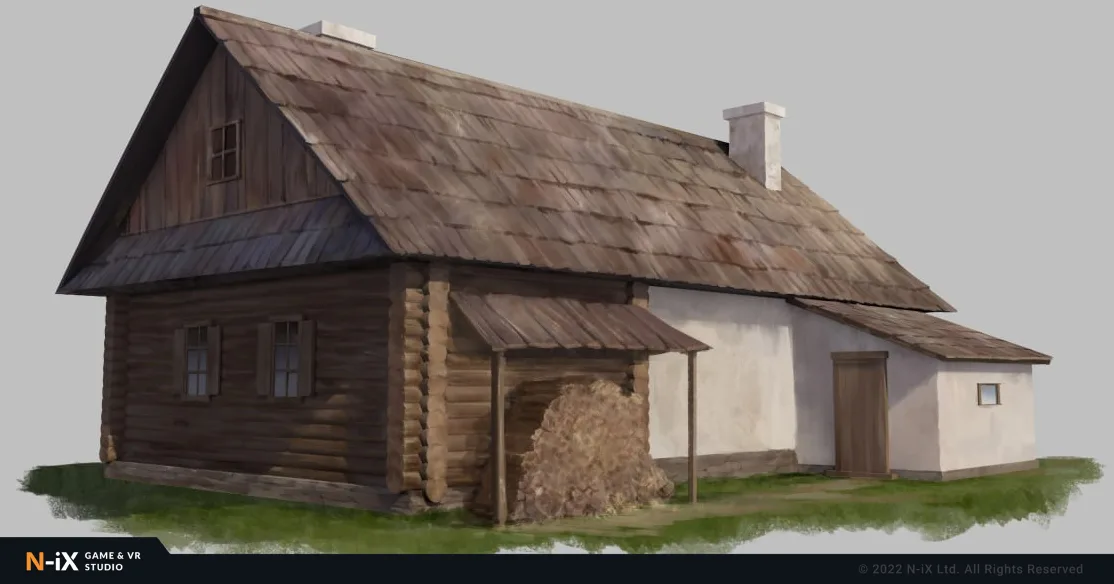
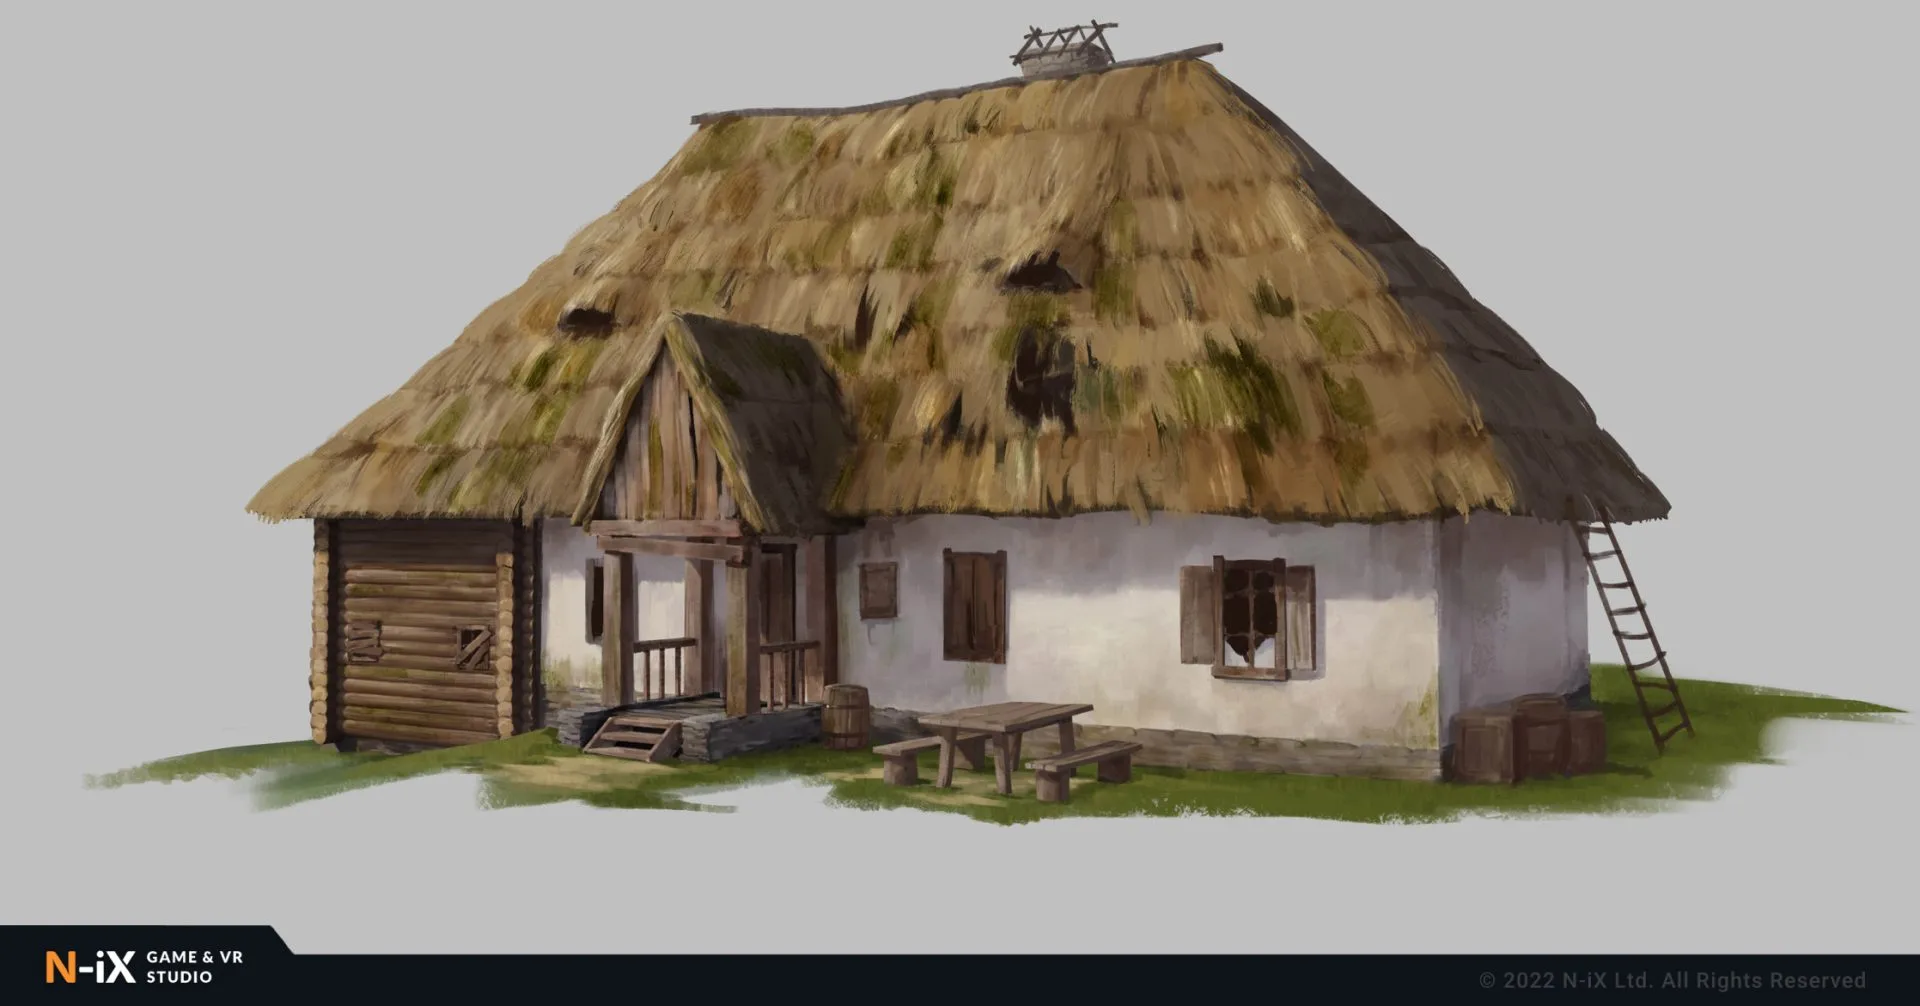
Now that we have a mood shot that represents the playable location we can proceed to add more details to the elements of the interactable environment (watermill, horses ranging from poorer to richer, church, etc.). Here we draw individually each building from different angles and create a higher-quality art that can become the foundation for the final 3D model. If there are narrative-important elements of the surrounding, we can make a close-up.
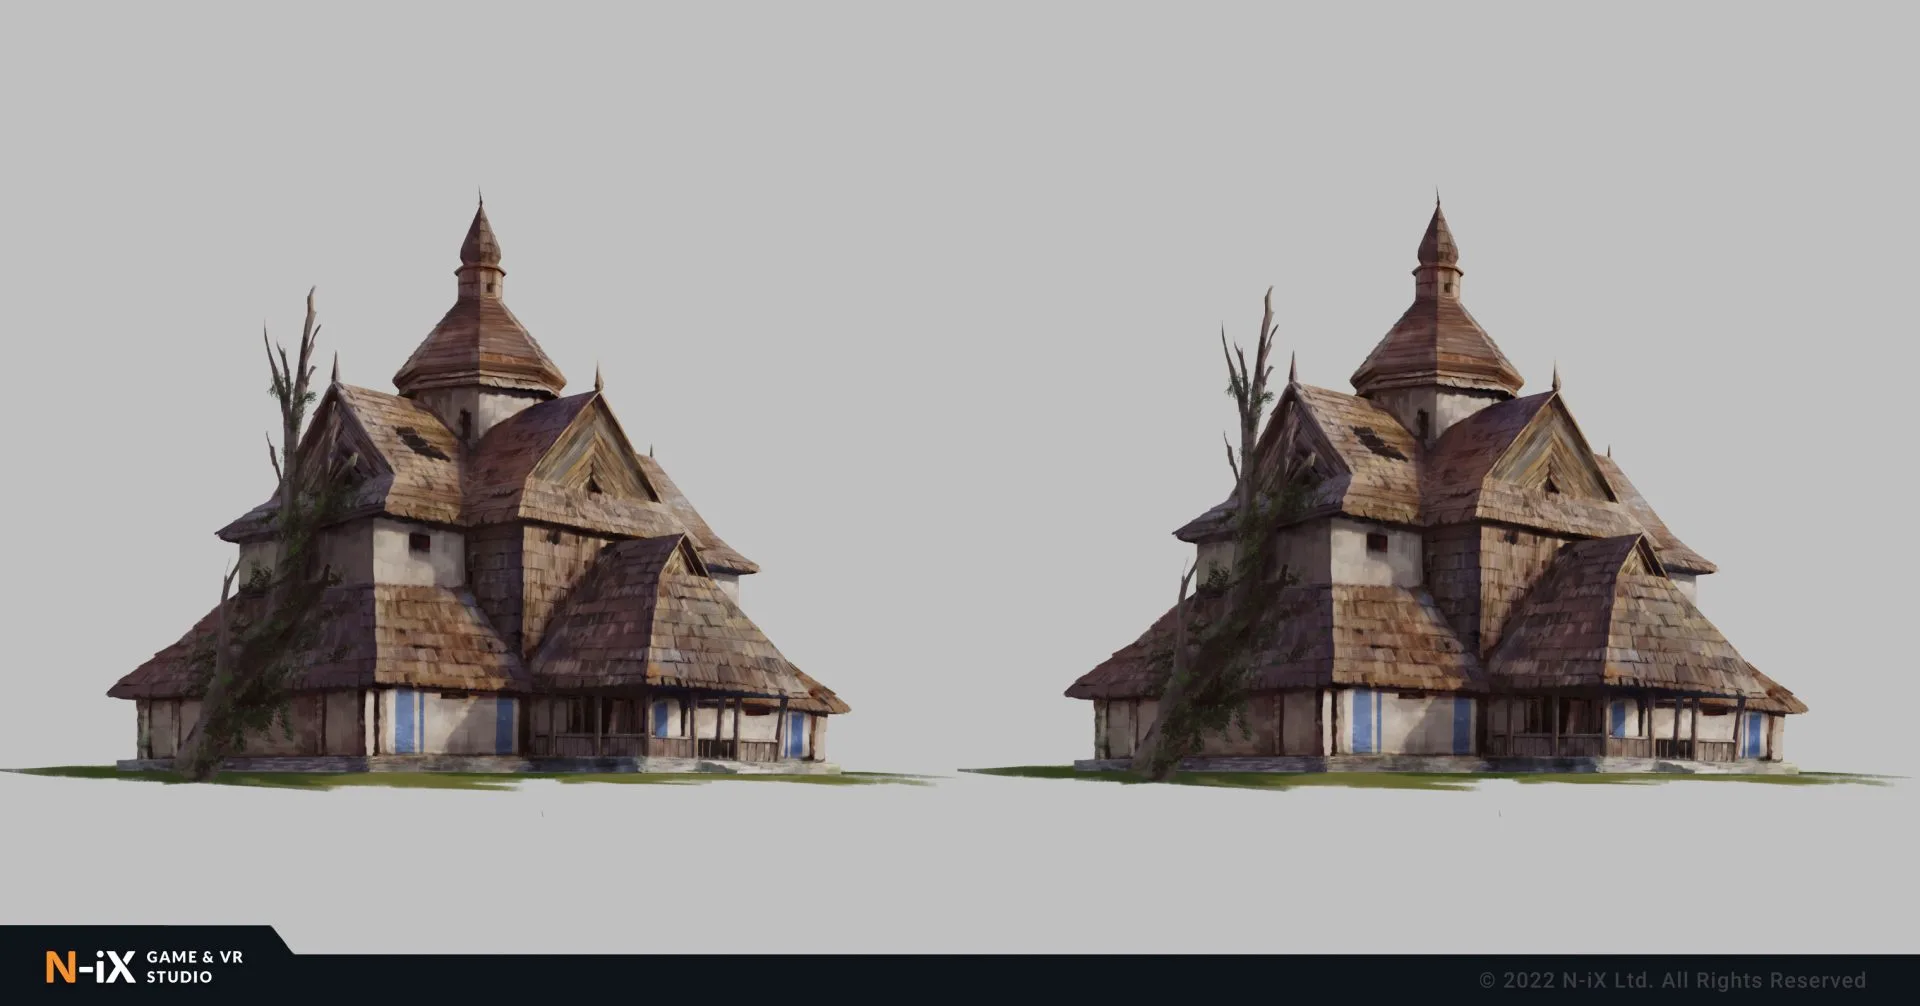
For example, here we made a create a comprehensive environment concept design of a church that explores the architectural intricacies, textures, and ornamentation specific to that particular structure:
#1
#2
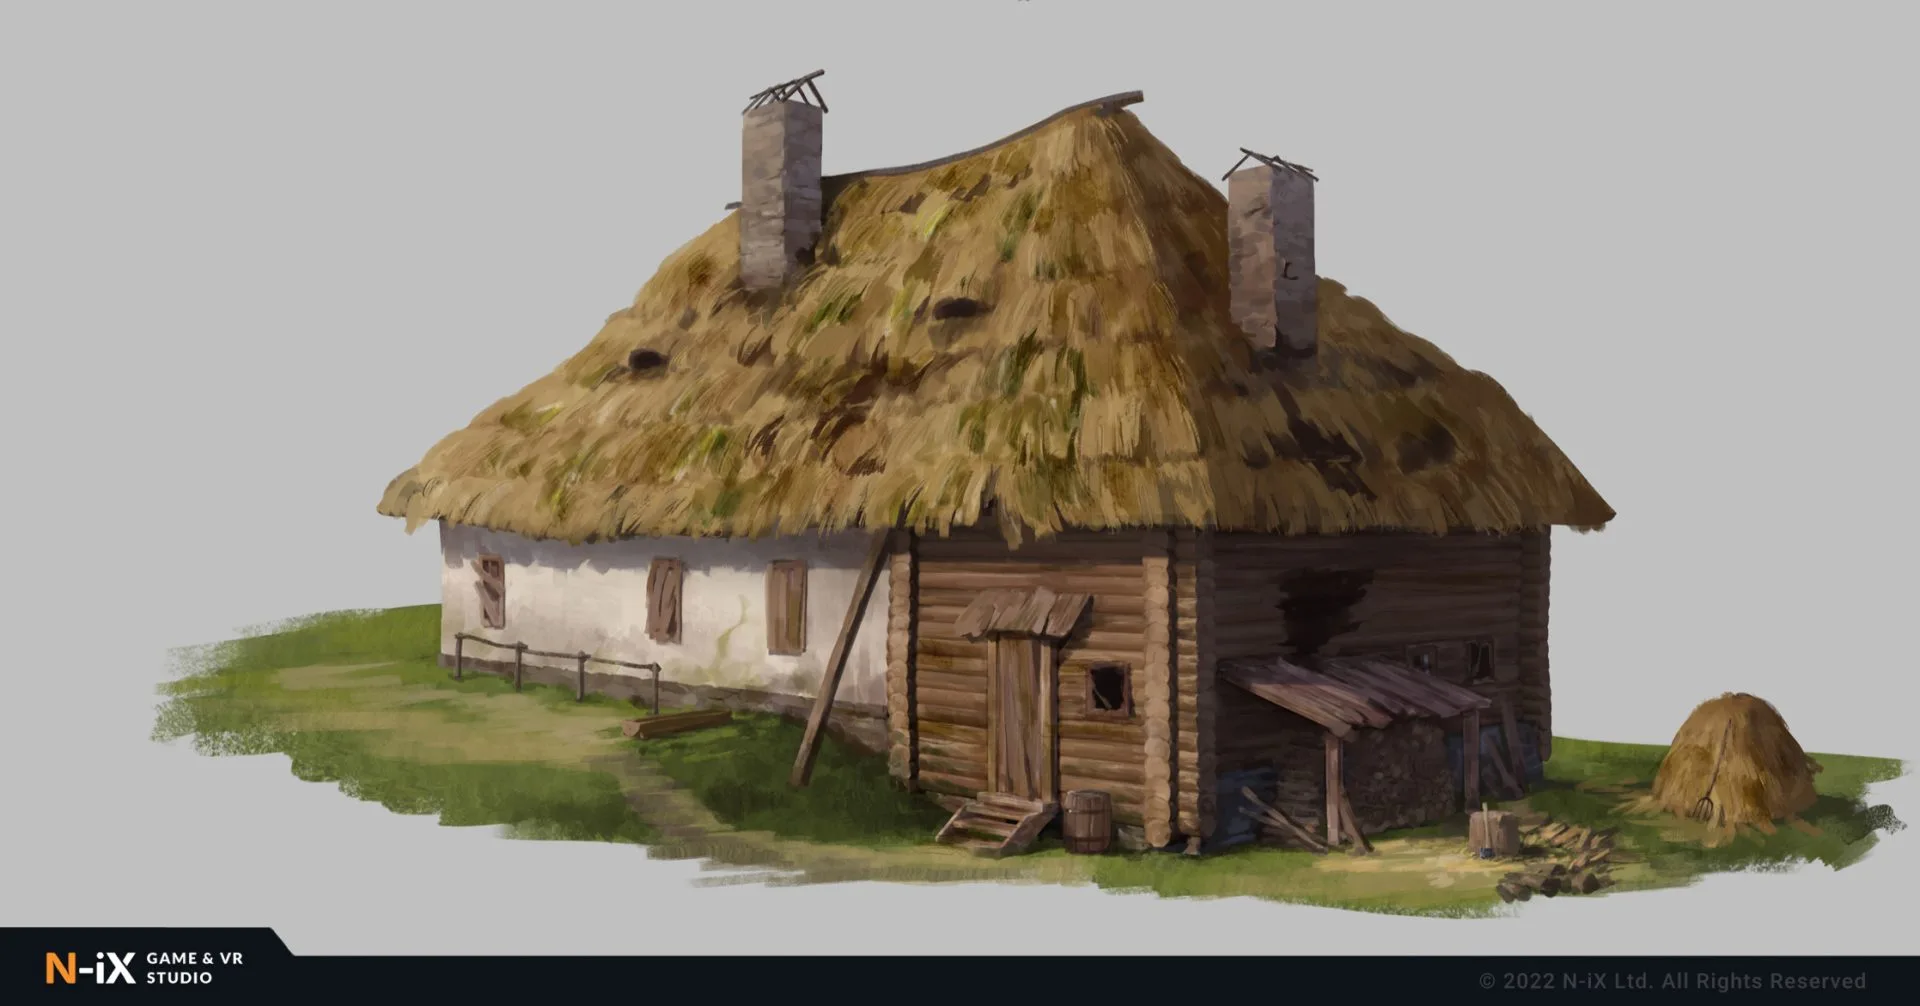
And here are some of the 2D game environment concepts of houses:
#1
#2
#3
#4
Historical Accuracy
If your game environments do not require historical accuracy, it is often better to avoid it. Reality is often disappointing, and if we are talking about old houses, for instance, they tended to be small, low, and kind of claustrophobic – all for the sake of heat preservation, reducing construction time and resources, etc. In games, this might not work well as players are used to more open and vast spaces.
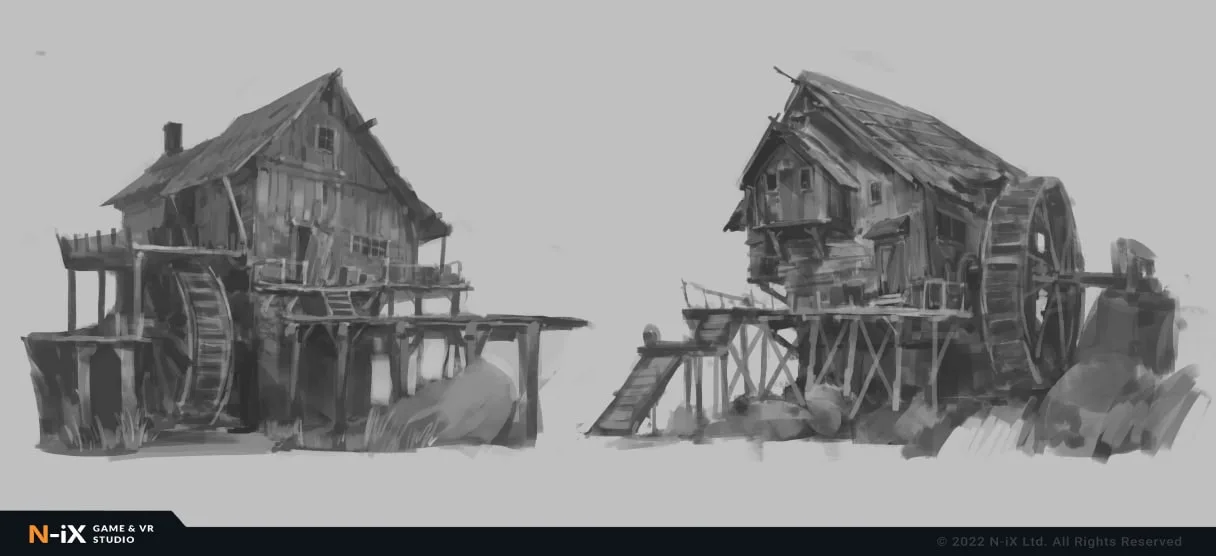
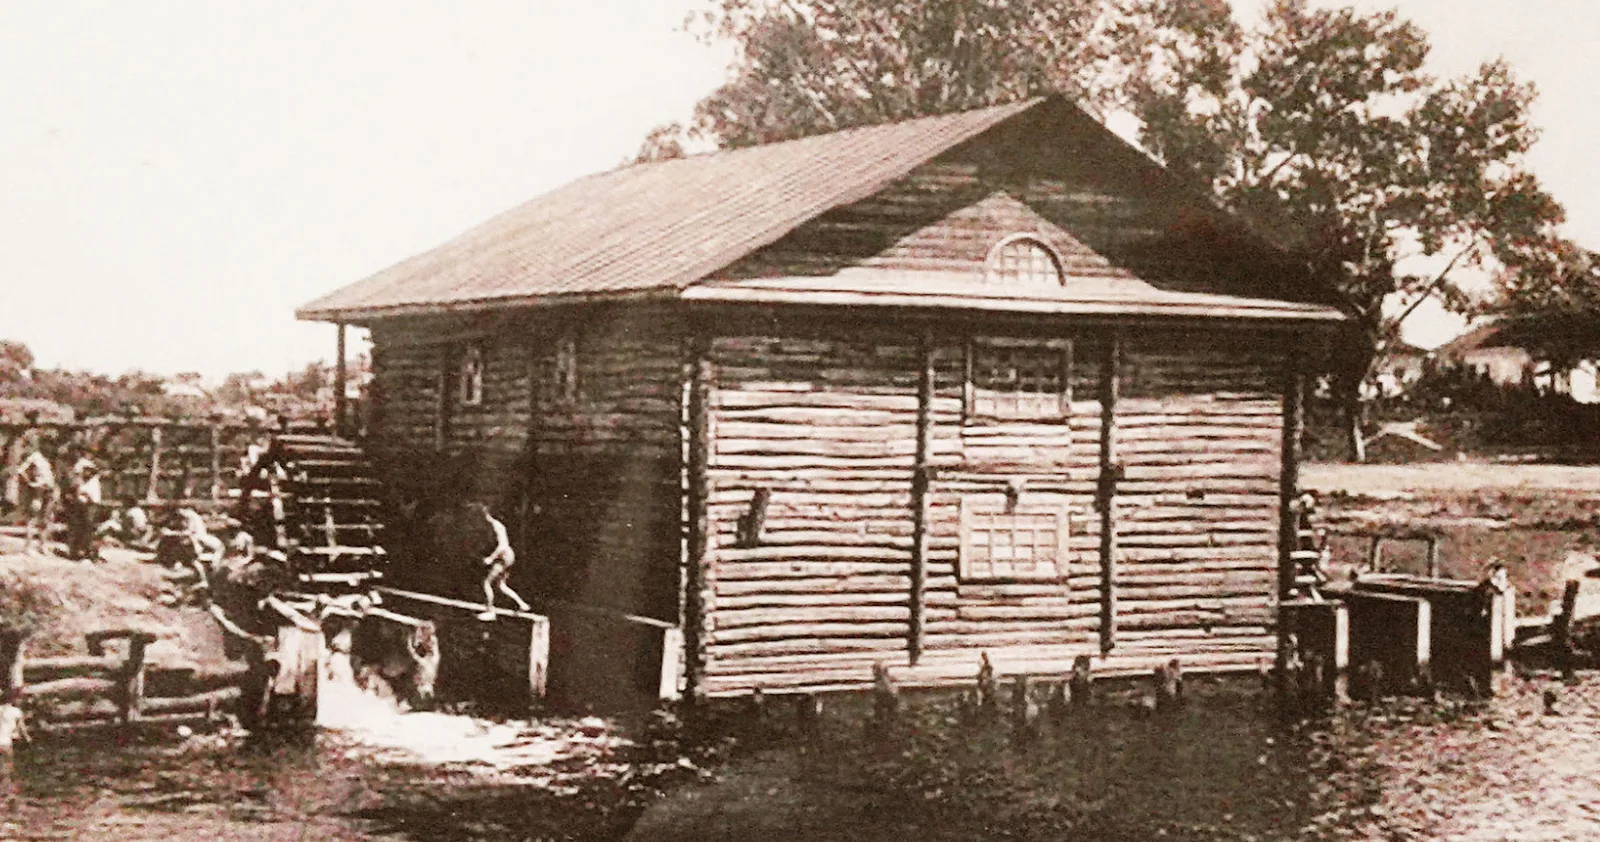
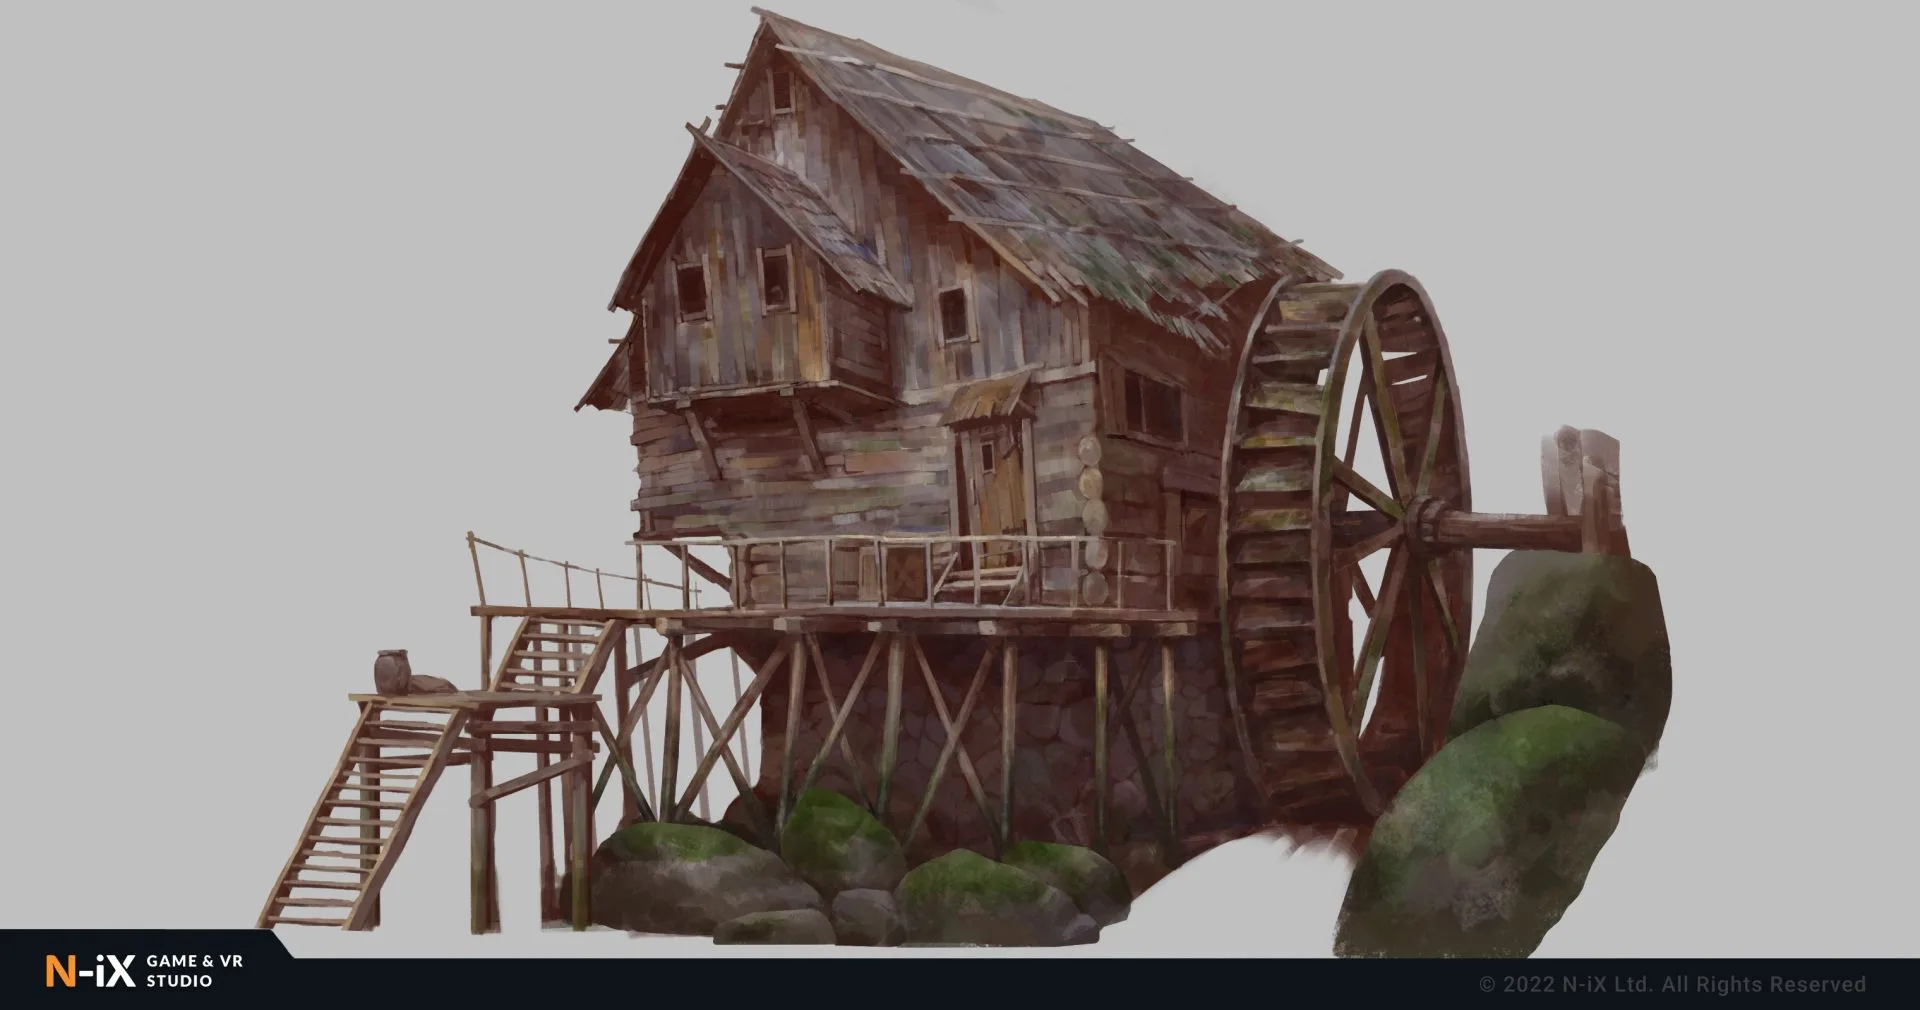
In our case, some buildings have become larger, more complex, and more interesting for the sake of visual enrichment. We allowed ourselves to move away from historicity a bit for the sake of beauty and to make it interesting for the player to explore the location. For example, the watermill:
Historically, a watermill was a modest and functional structure with a simplistic design and small rotating elements. Efficient but rather unimpressive from an esthetical standpoint.
However, since this building is very important for our story, and the players will be exploring it in detail, we decided to enhance its visual impact. We added more levels and details and exaggerated specific elements of the original structure:
Preparing references for 3D artists
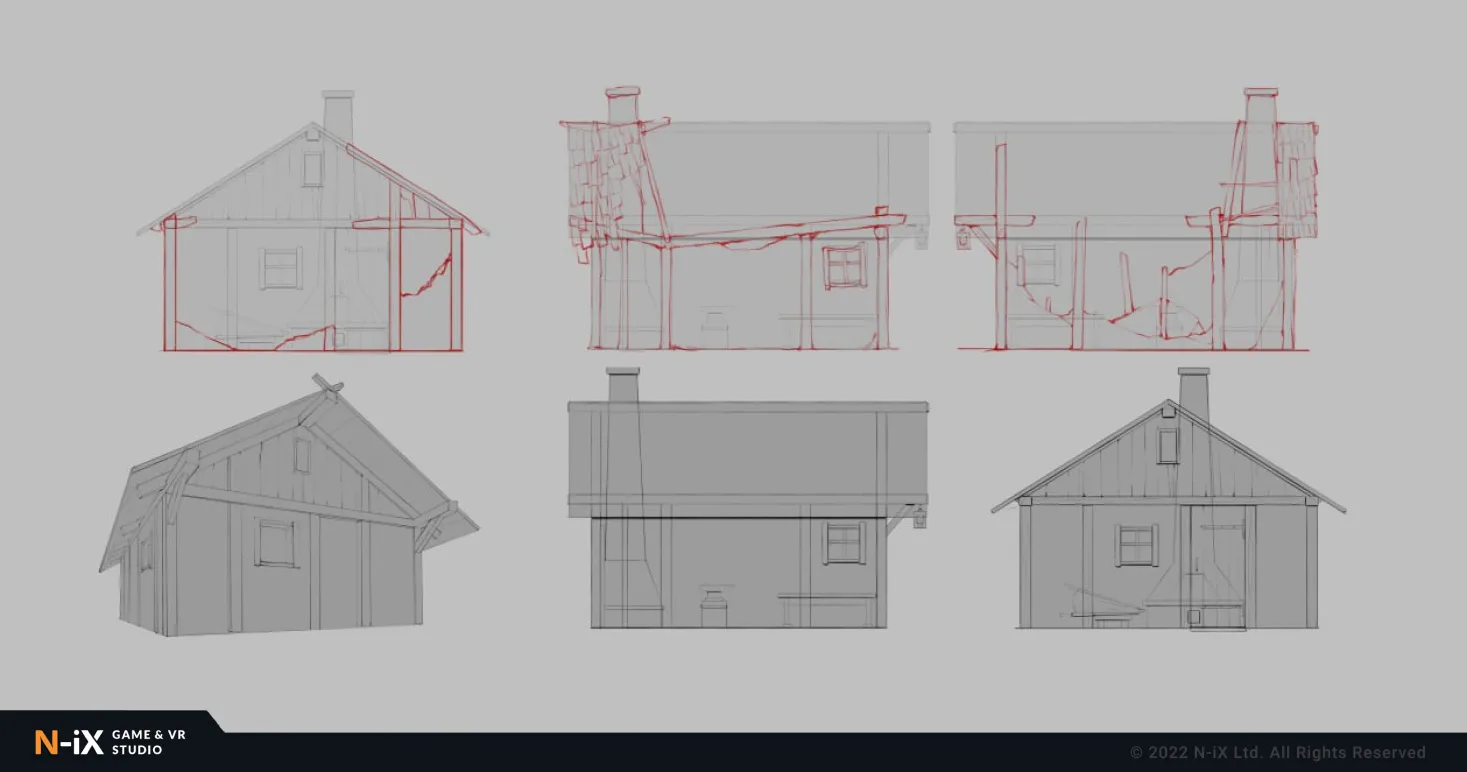
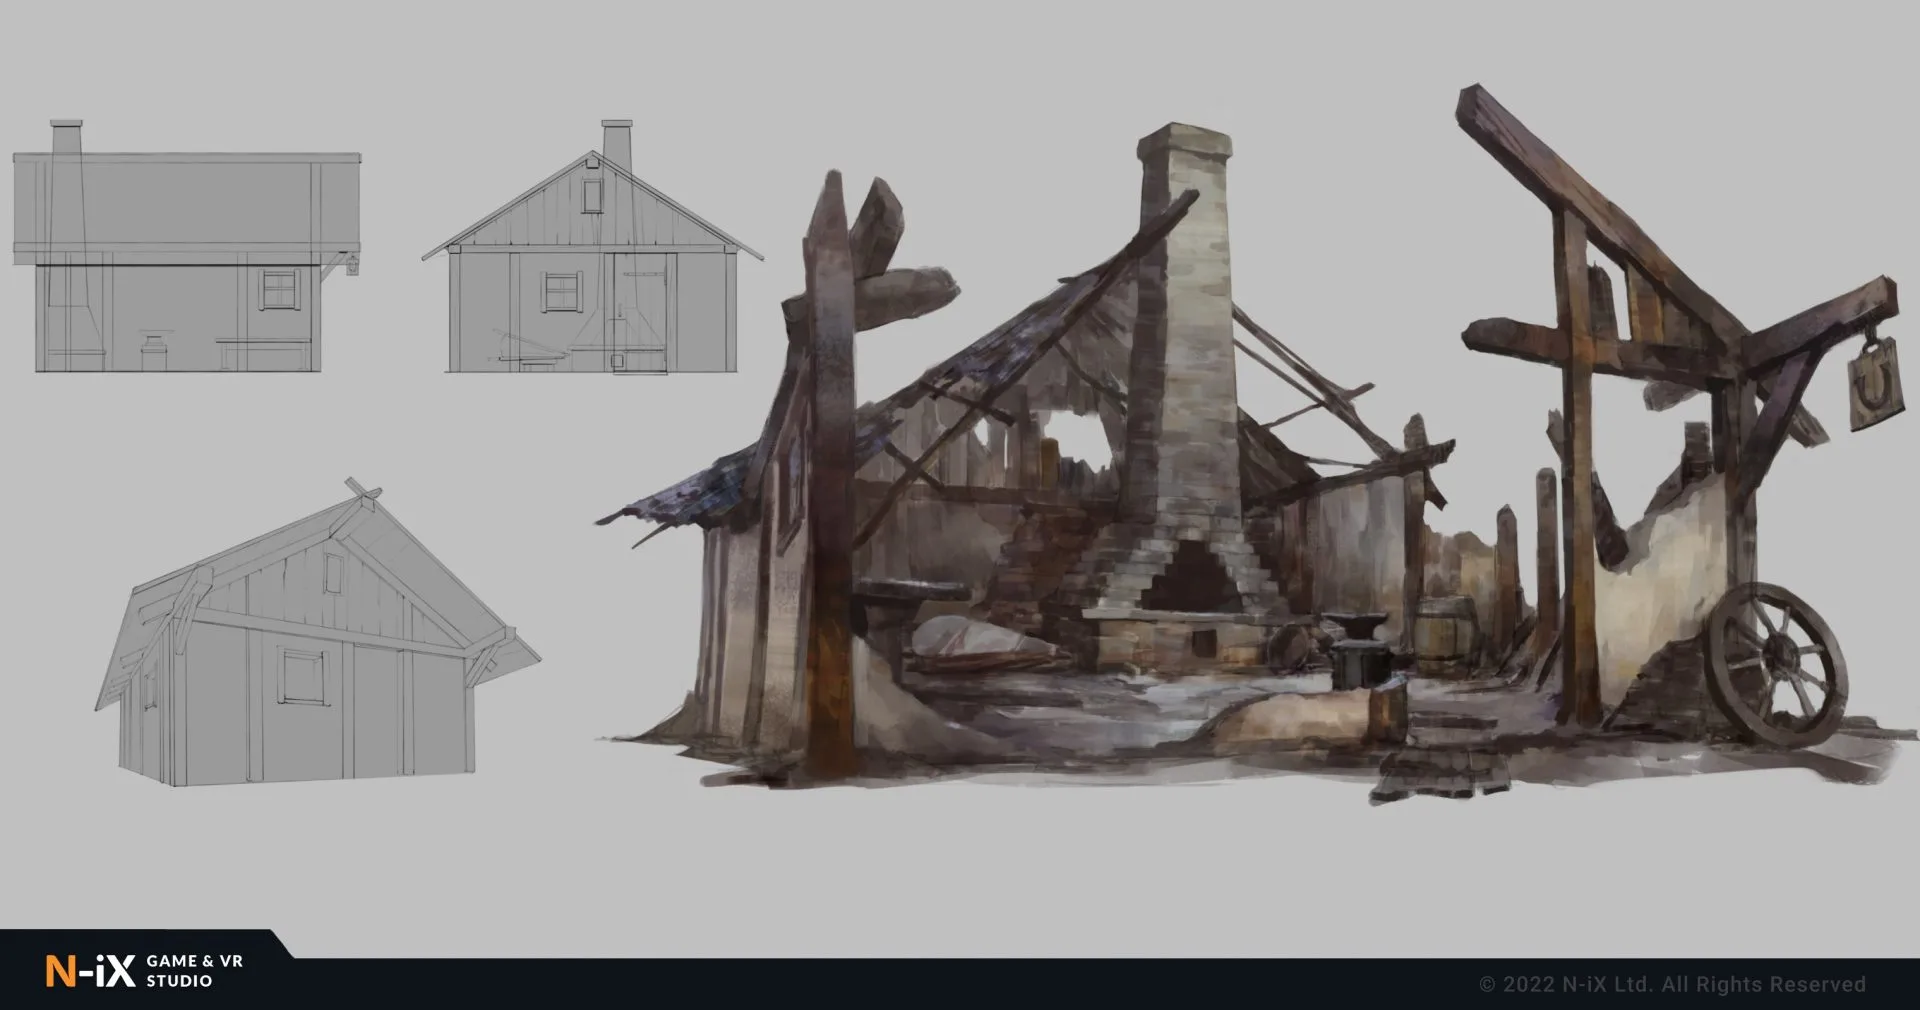
The final stage of the 2D art pipeline involves creating comprehensive visual projections that showcase different angles, compositions, and essential design features of game environments. These drawings serve as a visual guide for the 3D artists, highlighting key elements that should be emphasized in the final 3D models. Effective communication with the 3D team is crucial during this stage, as it allows for a clear understanding of the artistic choices made in the concept art.
#1
#2
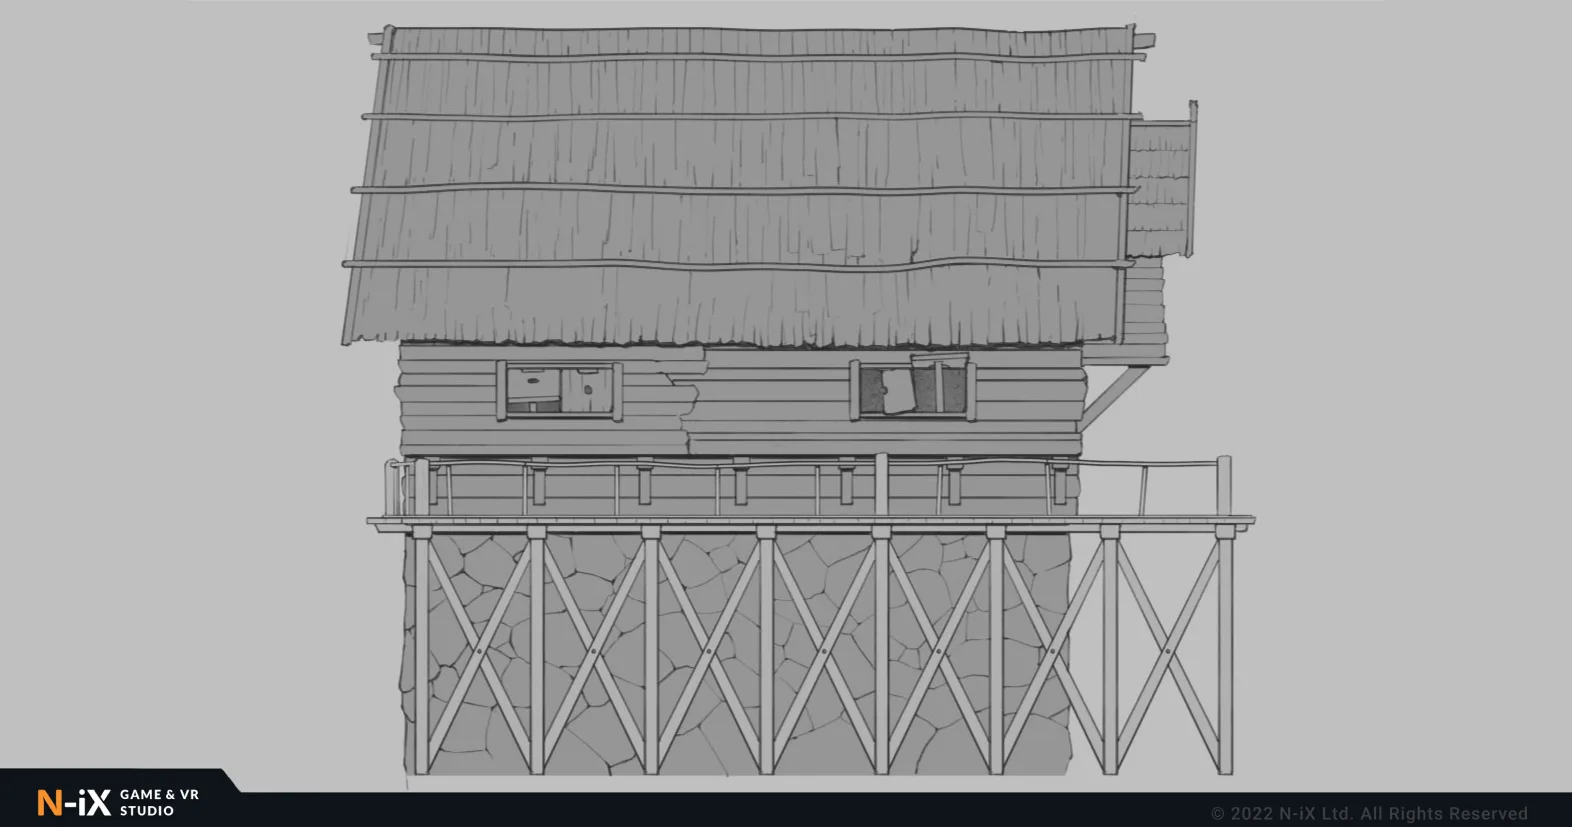
For instance, here we show the final concept, the undamaged house, and the silhouette of the burned-down house model. In this way, the 3D artist will understand the sizes and locations of the burned holes in the building. Sometimes it is also better to point out the materials that the structure is made of in our environment concept design. For our 3D Artists, initially, it was not quite clear whether the roof is made of straw or boards:
Wrapping up
The process of creating a playable location within the 2D environment art pipeline involves meticulous attention to detail and effective collaboration between the art director, 2D artists, game designers, and 3D artists. By developing in-depth concepts of the surrounding elements, deviating when necessary for visual appeal, and providing clear 2D game environment references for the 3D artists, we ensure a seamless transition from 2D artwork to immersive 3D environments. The next stage will explore how these concepts are transformed into fully realized 3D models, bringing the playable location to life.

